What will I learn here?
- Most important aspects of setting up the new job detail page
- Basic logic of job page templates
- Difference between dynamic and static content
- Use of modules
- Avoiding common pitfalls
Important: If you're short on time, make sure to read this article. It contains the key information you need to work with the new job detail page. Other articles can be read additionally as needed.
Video Summary
What do I need to know before editing?
Before you start designing, these basics are important:
- A job page template is the basic framework of your job detail page. It defines the layout and content modules.
- The dynamic content of individual positions (e.g. job description) is pulled from the applicant tracking system (ATS). This allows you to use one template for multiple jobs.
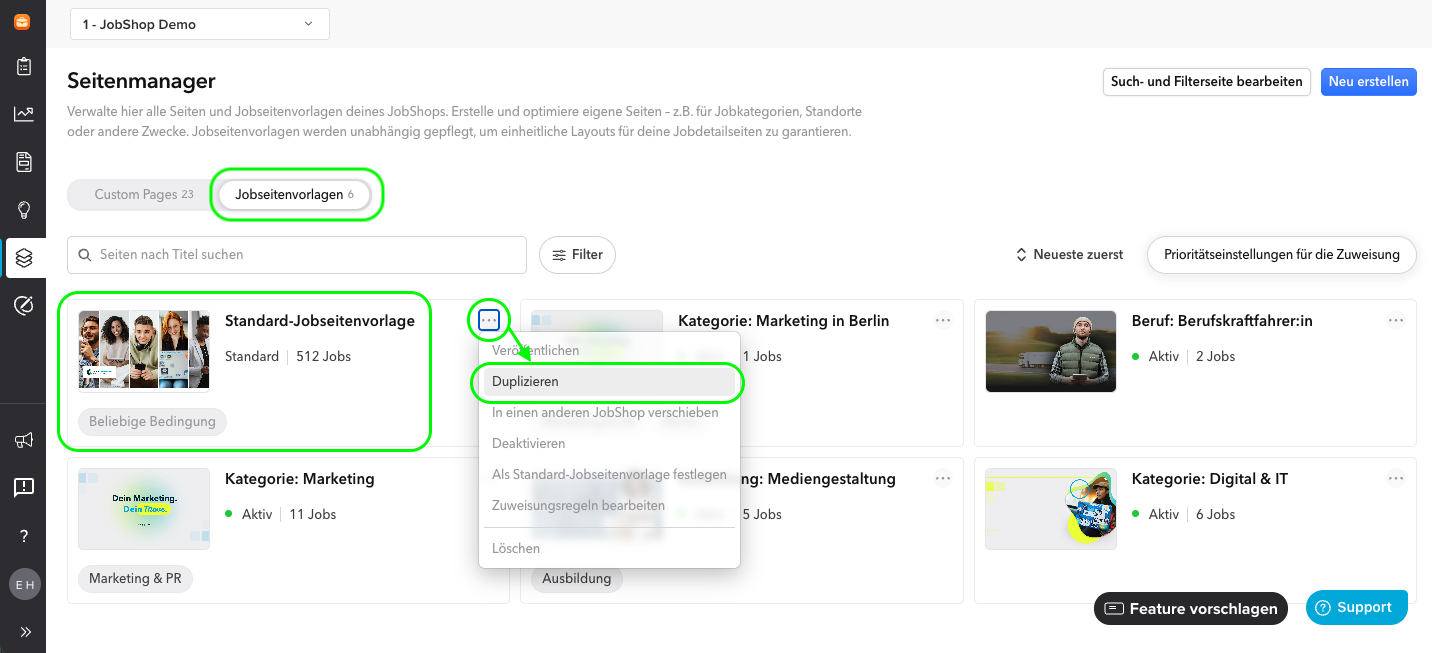
You can find the job page templates in the page manager under the "Job page template" tab.
No go-live for individual categories: To guarantee a consistent experience for applicants, switching to the new job detail pages is only possible per JobShop (and not, for example, for individual job categories).
What should I know about the templates?
Don't worry: You can't break anything
When you create or edit templates in the editor during the initial migration phase, this will not affect your currently live job postings in the old frontend. You can test and experiment freely. You can find the job page templates in your page manager.
The switch to the new job detail pages will only be carried out in consultation with you by talentsconnect. The new templates will only go live after your final go-live approval. Only from that point on will changes affect your active jobs.
What is the "Default Job Page Template"?
The default job page template is an automatically created sample template in the system. It has no connection to the old system or your old job pages.
You can:
- delete the included modules at any time,
- add new modules,
- freely customize content and structure,
- set a different job page template as the default job page template.
It also serves as a fallback template: If a job is not assigned to any other template or an assignment is missing, the default template is used automatically.
Note:
- The default job page template has no additional functions other than duplicating, such as editing assignment rules, etc. This is intentional due to its significance – since it serves as the default and fallback template, it is always available and all jobs (not otherwise assigned) are automatically assigned to it.
Tip:
- Design the default template to be as neutral and general as possible, so it is suitable for all jobs in an emergency.
- It's best to first create a template with a good basic structure and then duplicate it. This will save you a lot of work.
How do I edit the templates in the editor?
Working with the editor
Editor layout
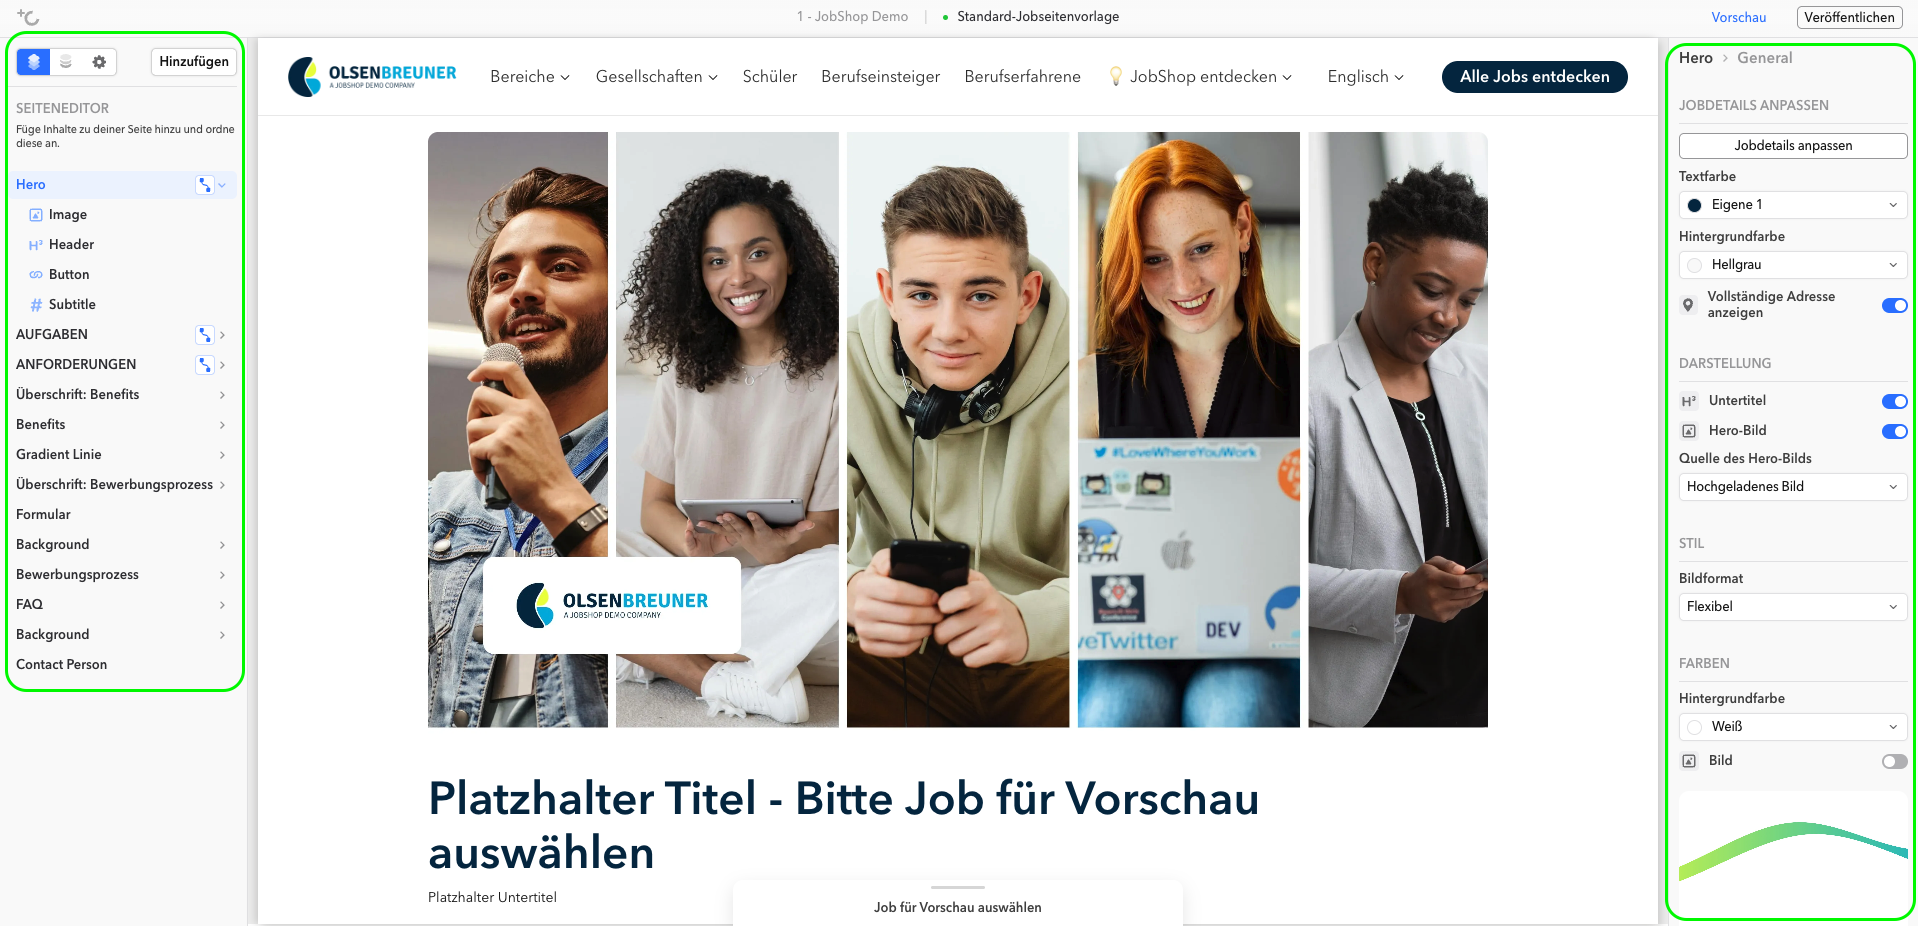
On the left side of the editor you can see all the modules currently included in your job page template. In the center you see the preview of your job page template. On the right, the design options appear as soon as you click on a module on the left. There you can adjust the settings of the selected module.
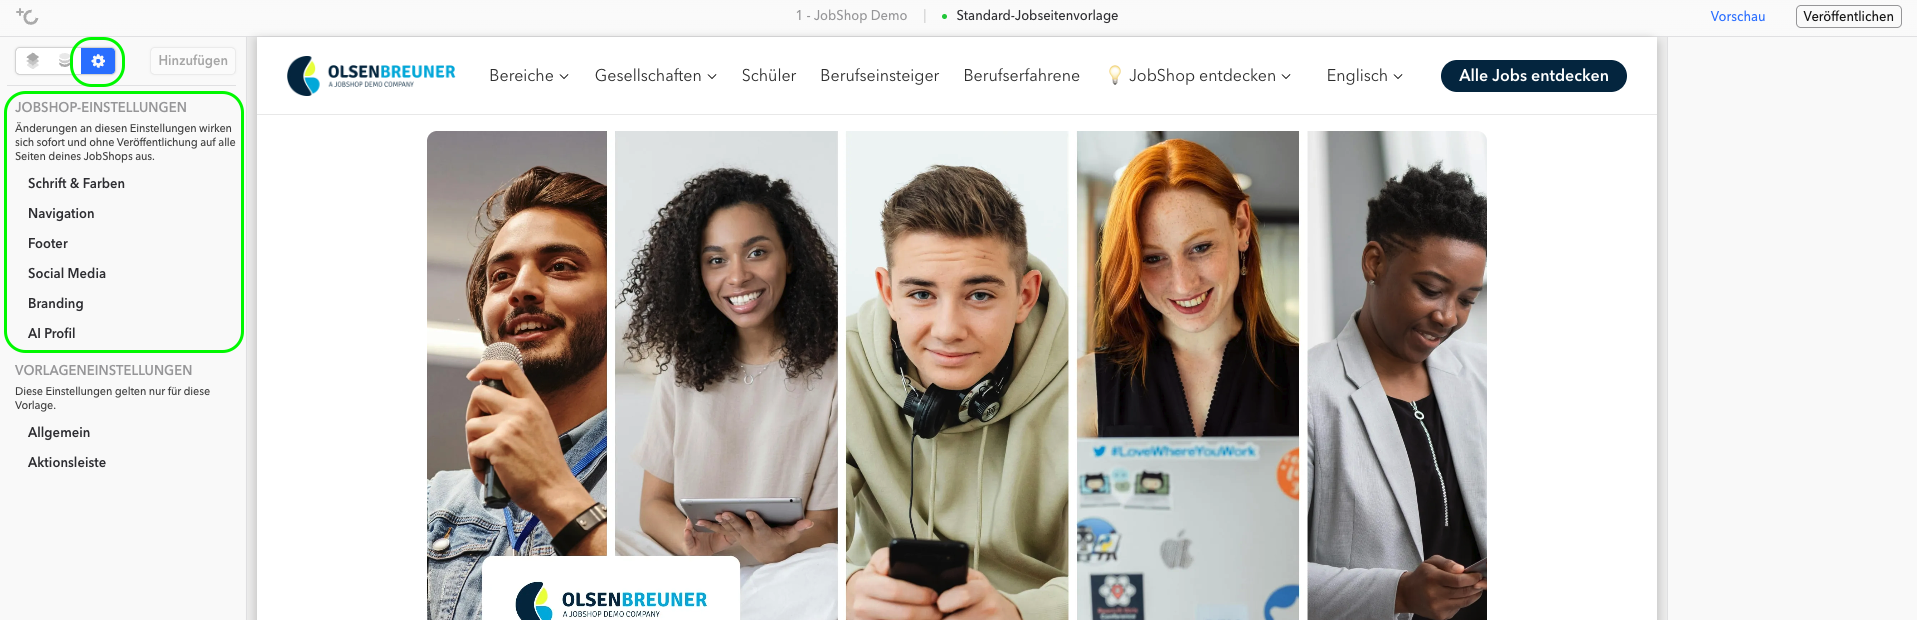
JobShop Settings (gear icon)
The JobShop settings apply to all pages across the entire JobShop.
For changes to a single template, you should therefore work mainly within the template itself.
Template settings
The template settings apply to the selected template. Here you can change the internal title of your template under "General".
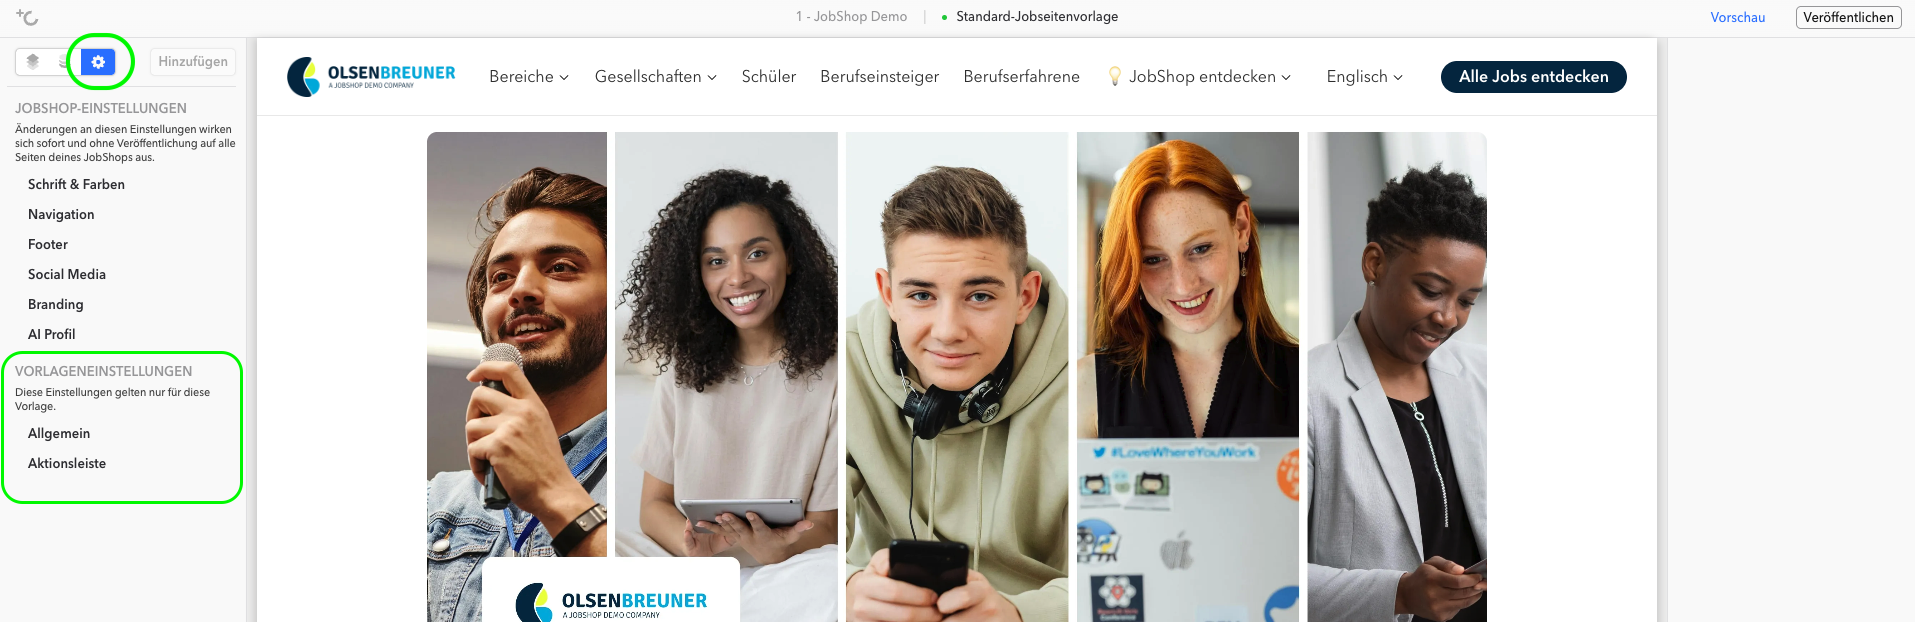
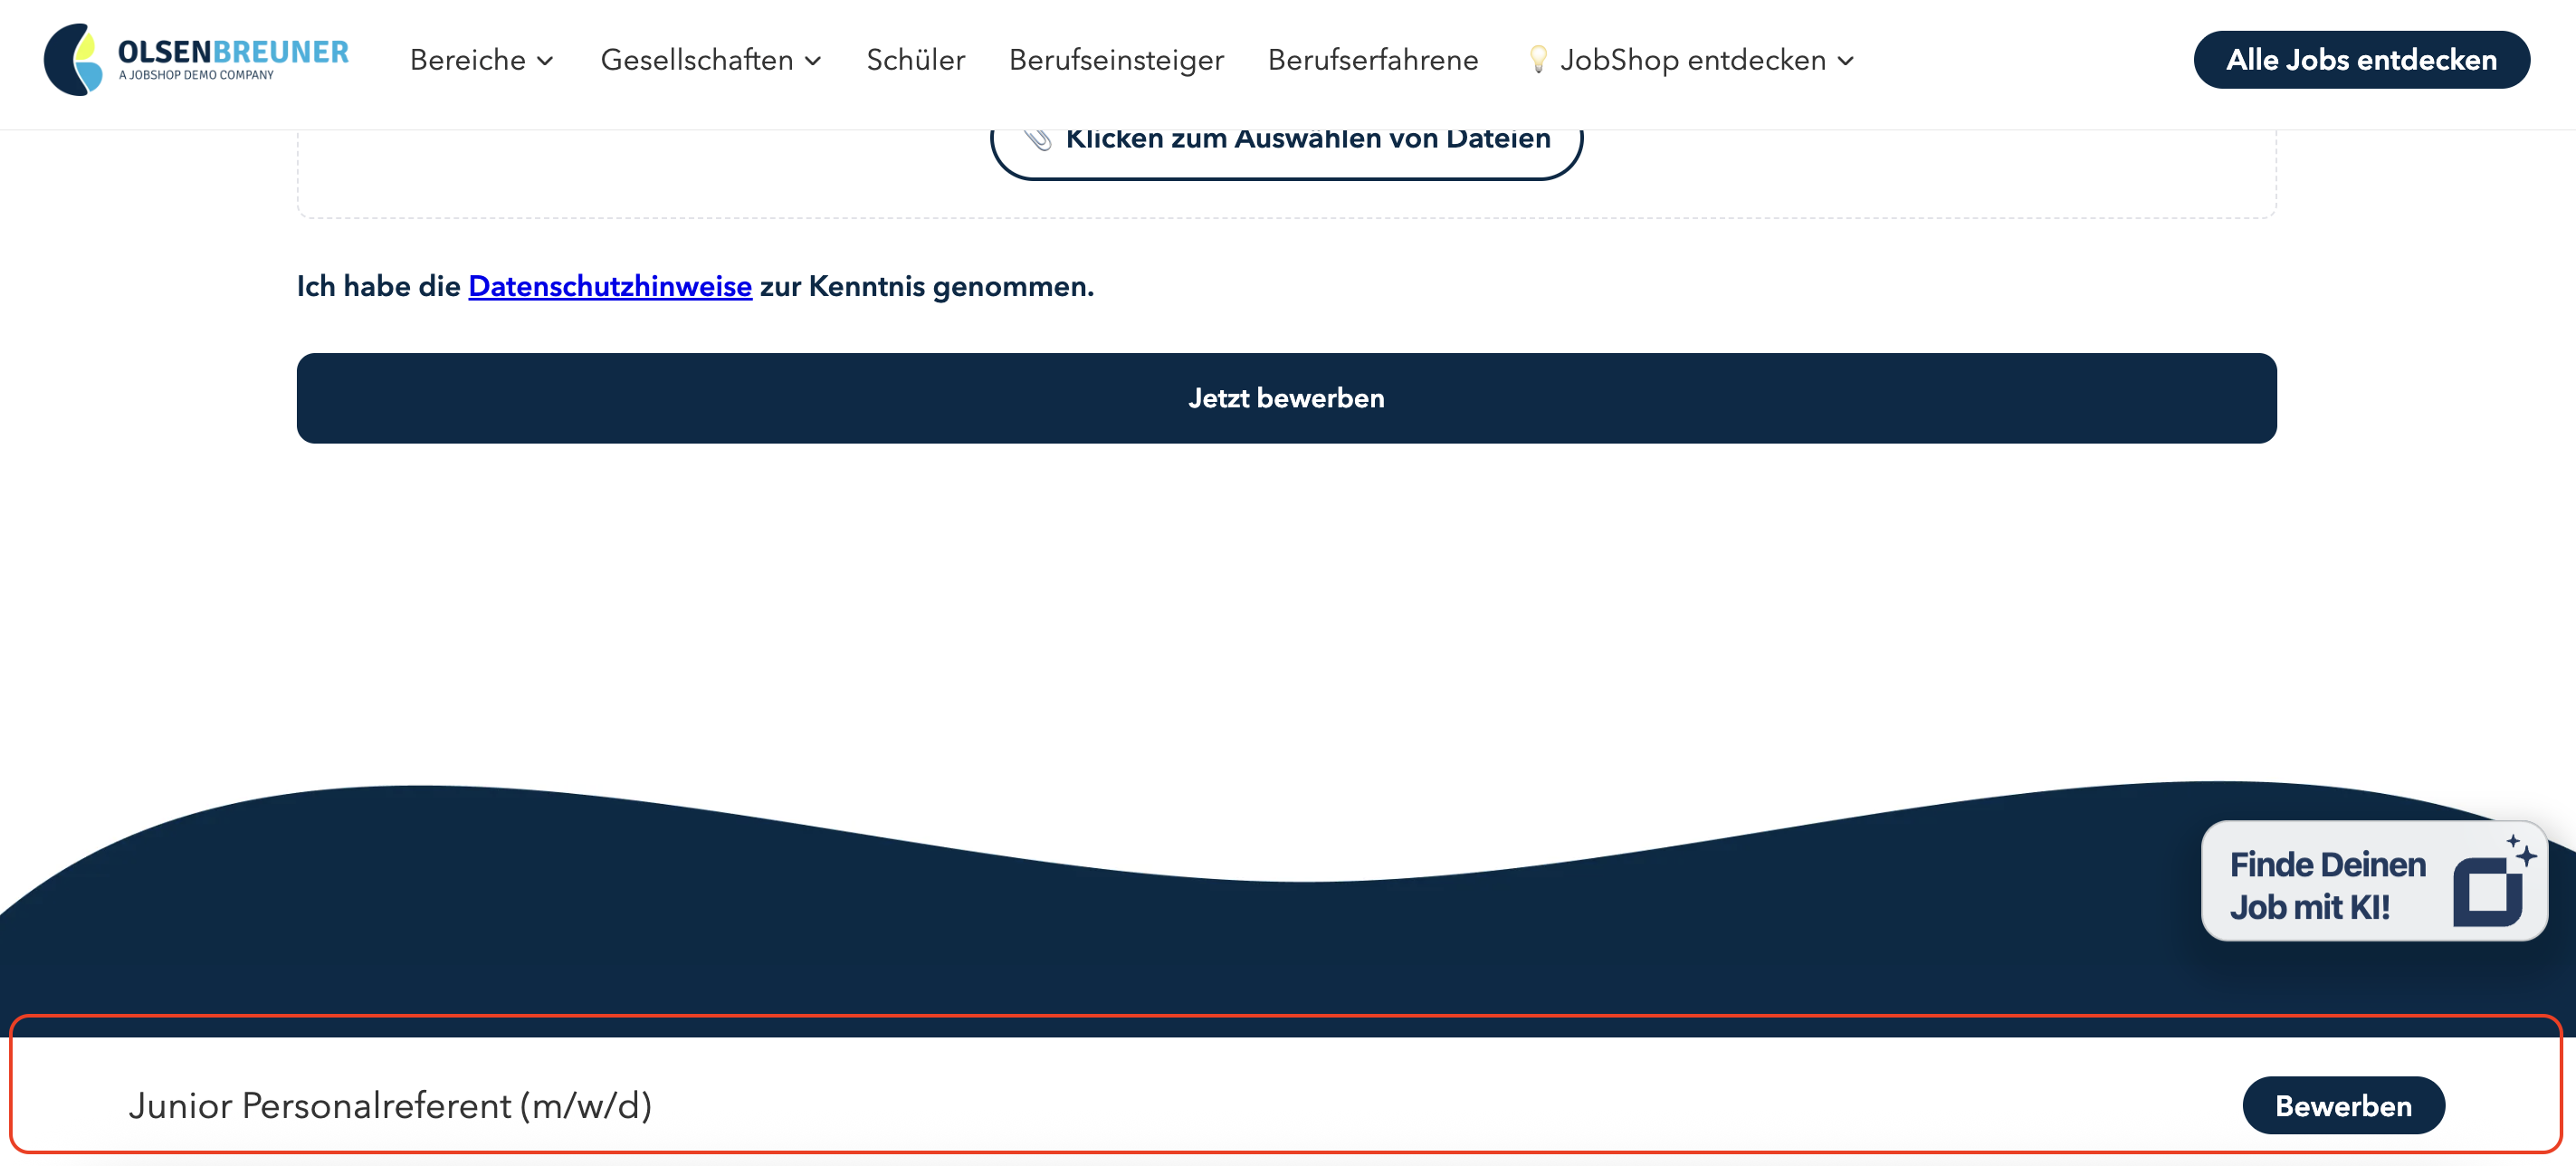
You can also customize the "action bar" there:
- The action bar appears at the bottom of the page when scrolling.
- It displays the job title and an apply button that would otherwise no longer be visible when scrolling.
- The action bar can be disabled if needed.
- The style can be adjusted via the JobShop settings (e.g. to match the hero or navigation), so the design looks consistent.
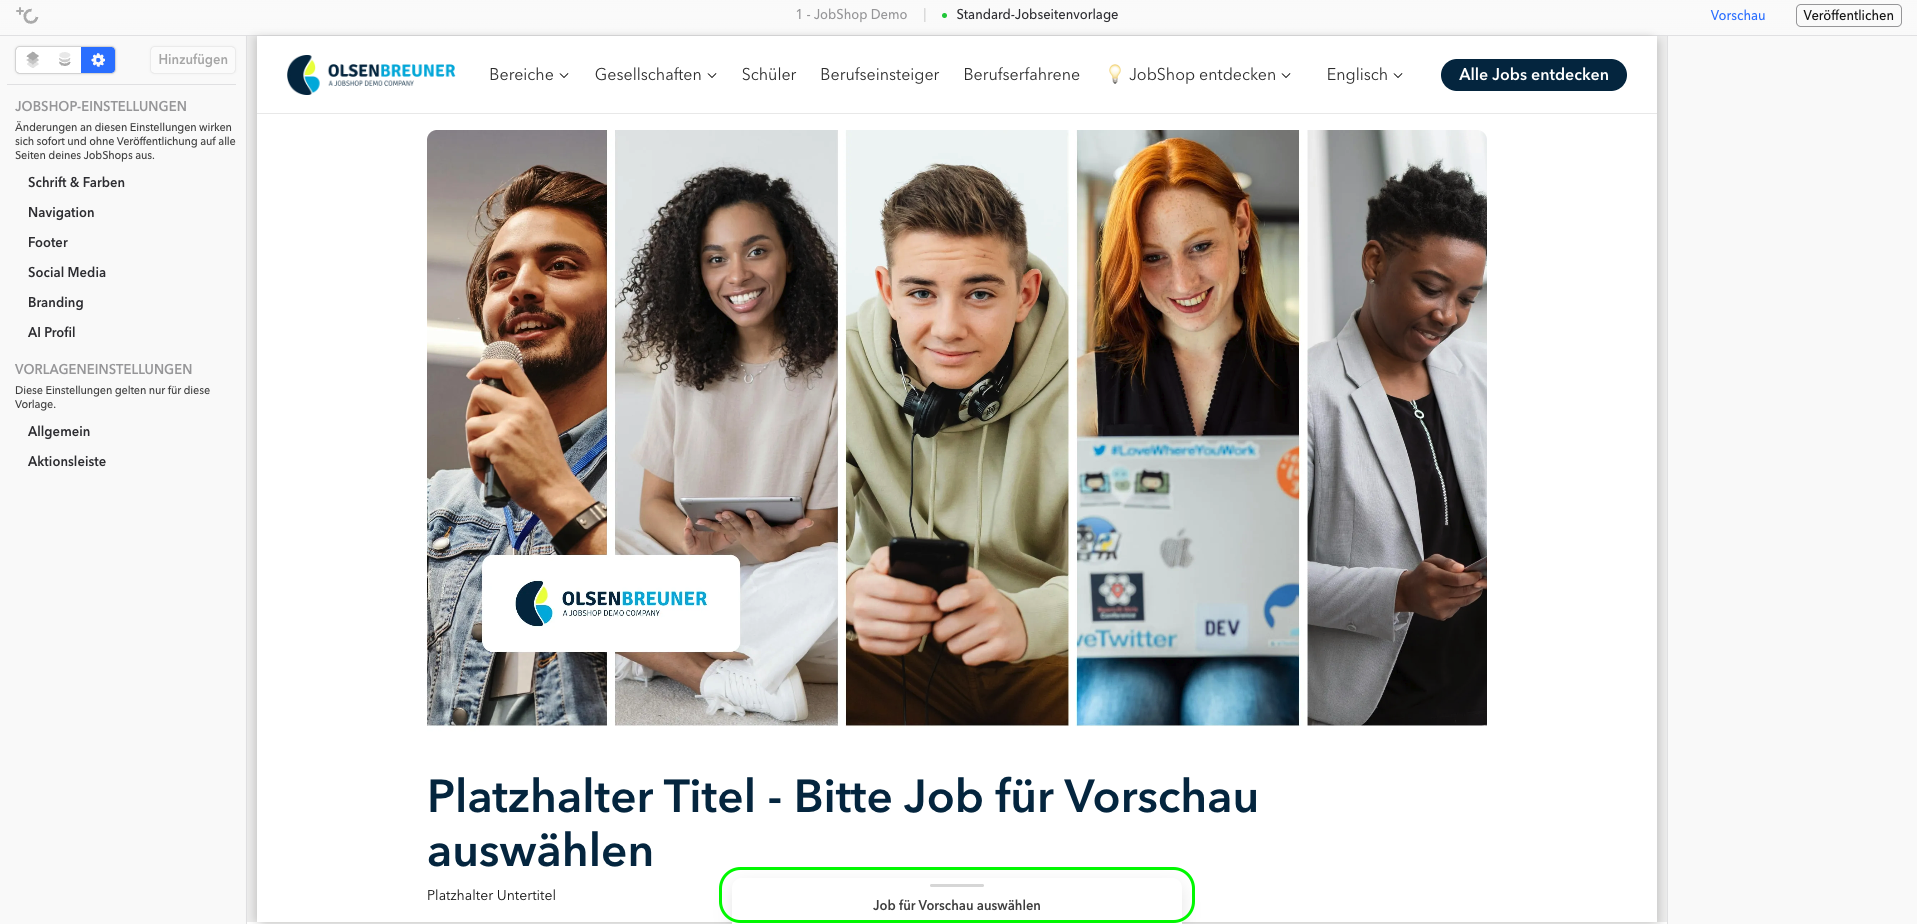
Select a job for the preview
You can select a job in the editor to see in the preview how the content will look later with real data. However, this does not yet link the job to the template – that is done in the "Jobs" navigation area or as an interface configuration.
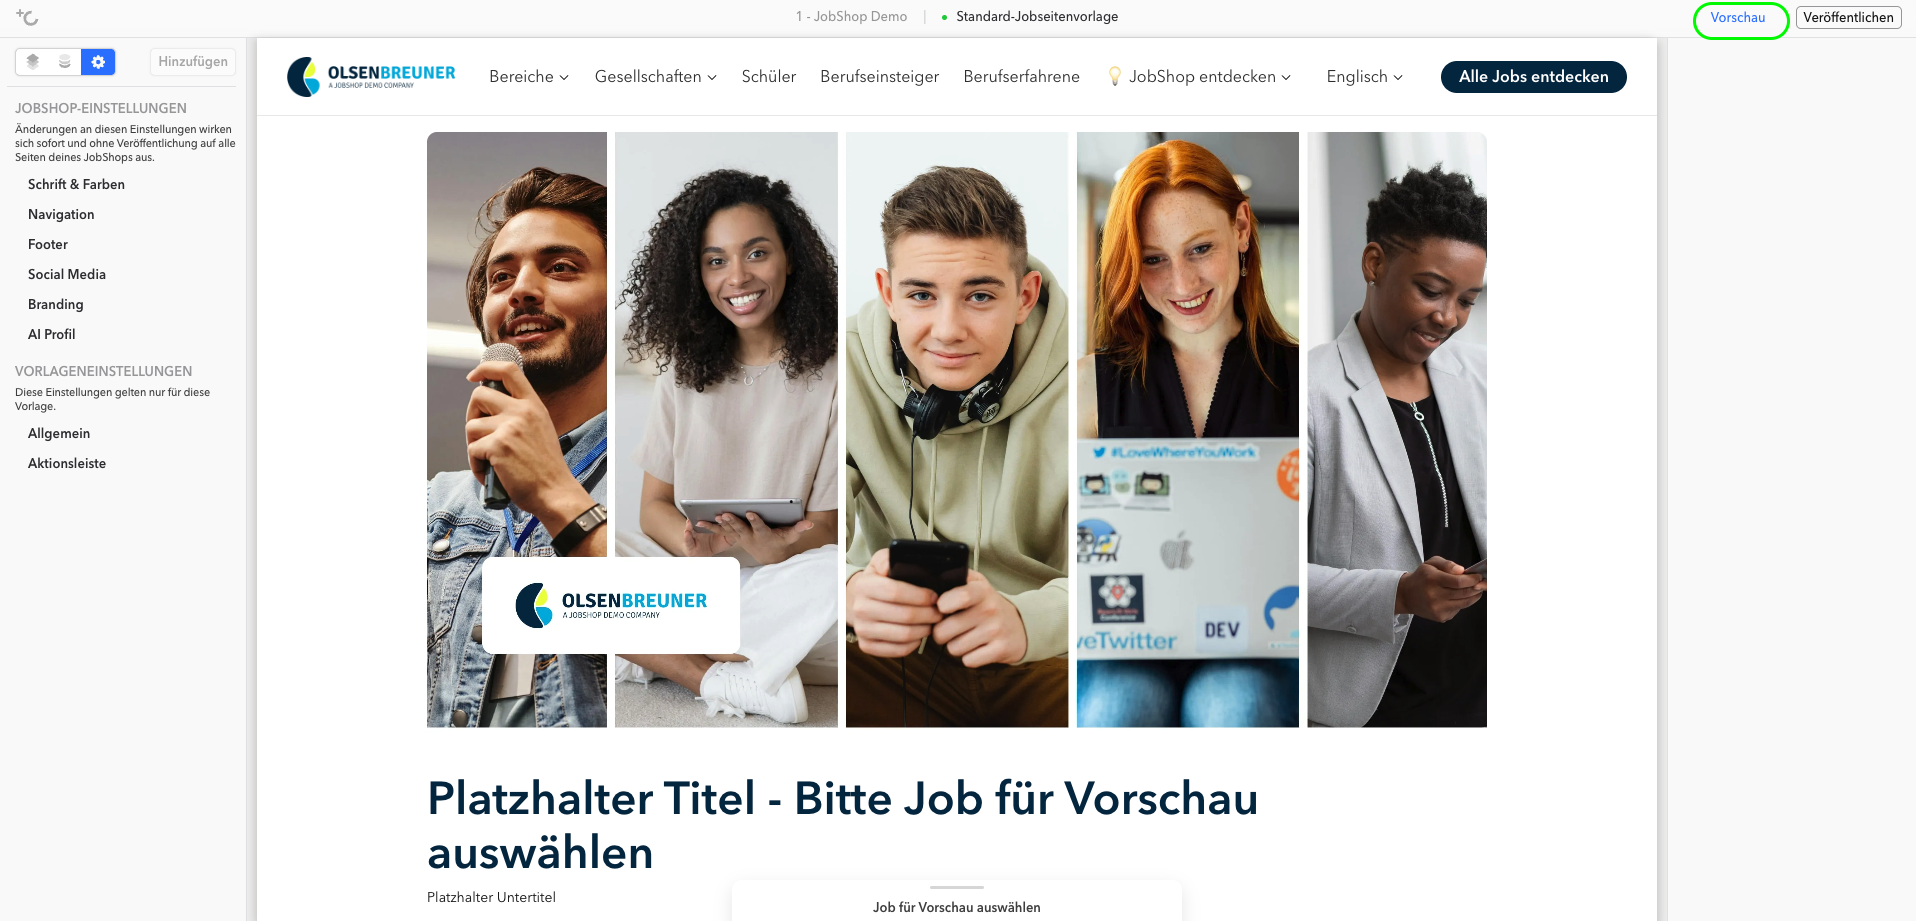
Mobile view
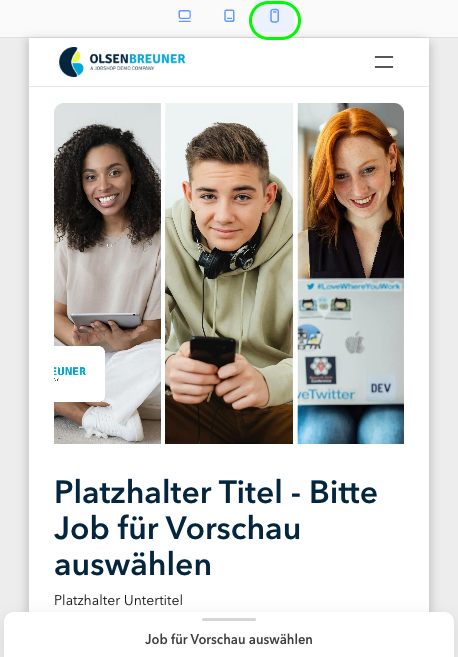
Using the "Preview" button, you can view the page without the editor view. From there you can also switch to the mobile view.
The display in the preview is responsive, but currently not configurable device-specifically (meaning you cannot set different content separately for mobile and desktop).
Moving modules
You can move modules in the left column of the editor via drag & drop to adjust the order.
Copy/Paste function
Modules can also be copied and pasted in the left column of the editor:
- with Ctrl+C / Ctrl+V via the keyboard
- or via right-click
Important: When pasting via right-click, you must click directly on an existing module. A right-click on the white area will not work.
If copy/paste does not work, this is often a browser setting. In that case, the browser must be allowed to copy content to the clipboard.
- If necessary, an IT admin must whitelist TC Home.
Showing/hiding parts within a module
You can show or hide individual components of a module.
To do this, click on the parent module in the left column of the editor and use toggles in the right column of the editor to activate or deactivate individual elements.
Tip: Combine modules flexibly
- You can also "repurpose" modules and combine them creatively, depending on how you want to display content.
Individual modules
Hero
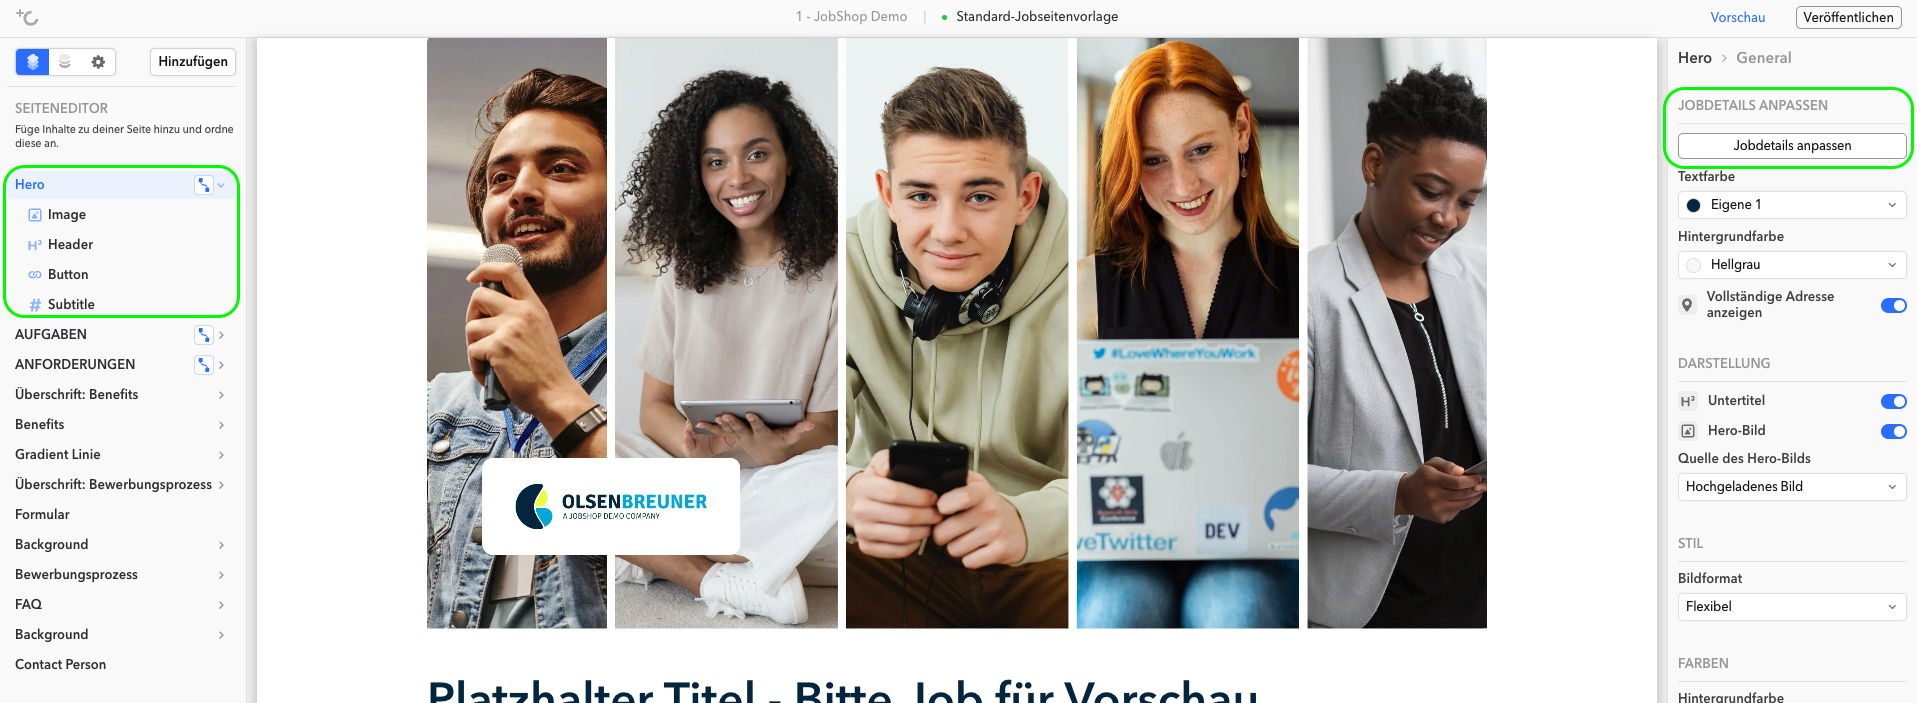
The hero module is dynamic: title and job details are pulled from the ATS.
The hero image can be pulled dynamically from the ATS or a manually imported image can be used as the source. The setting for the source of the hero image can be found directly on the hero module.
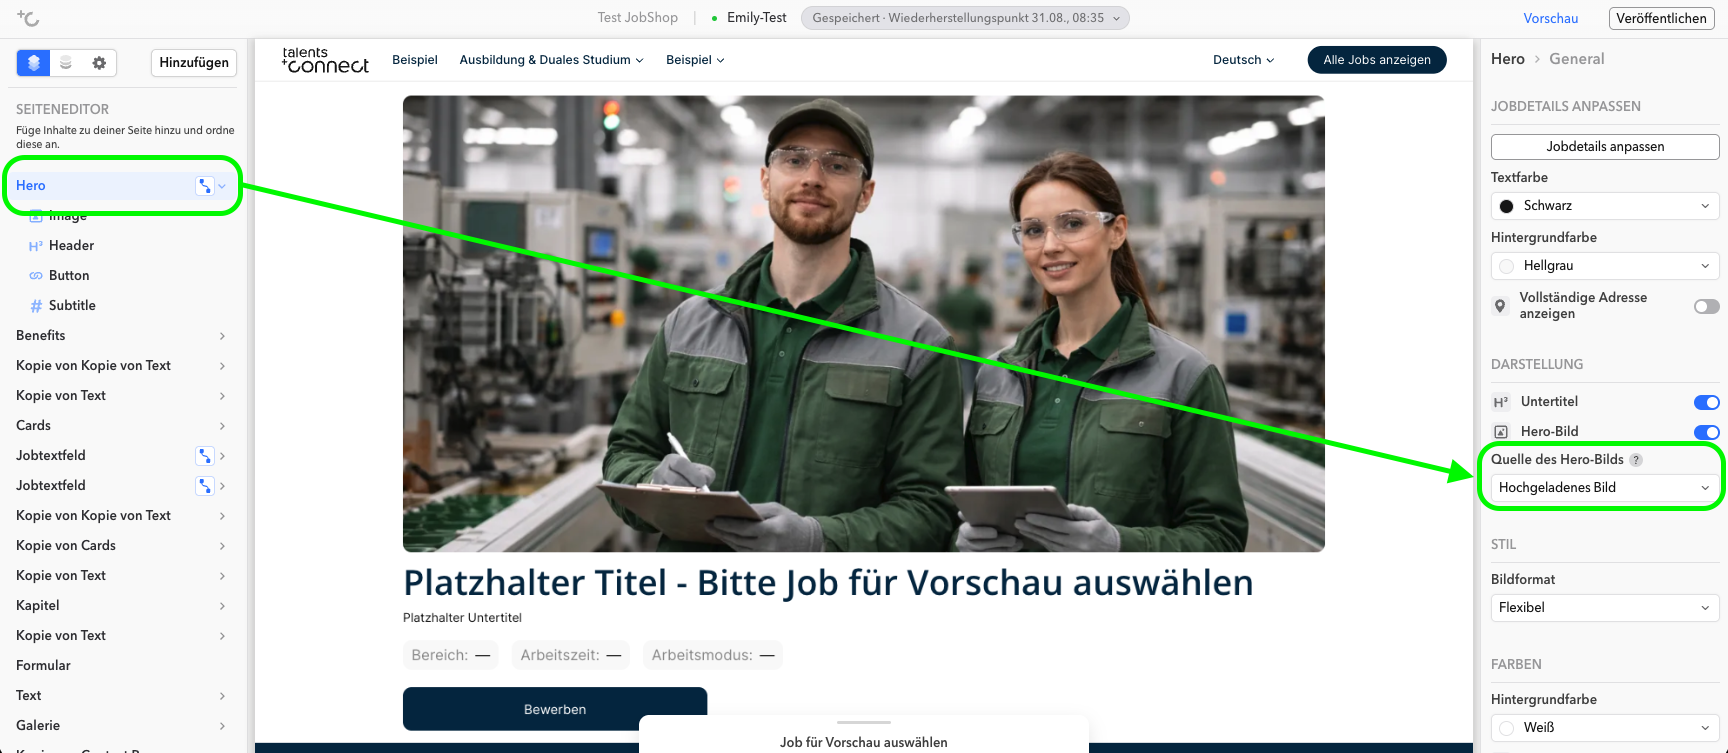
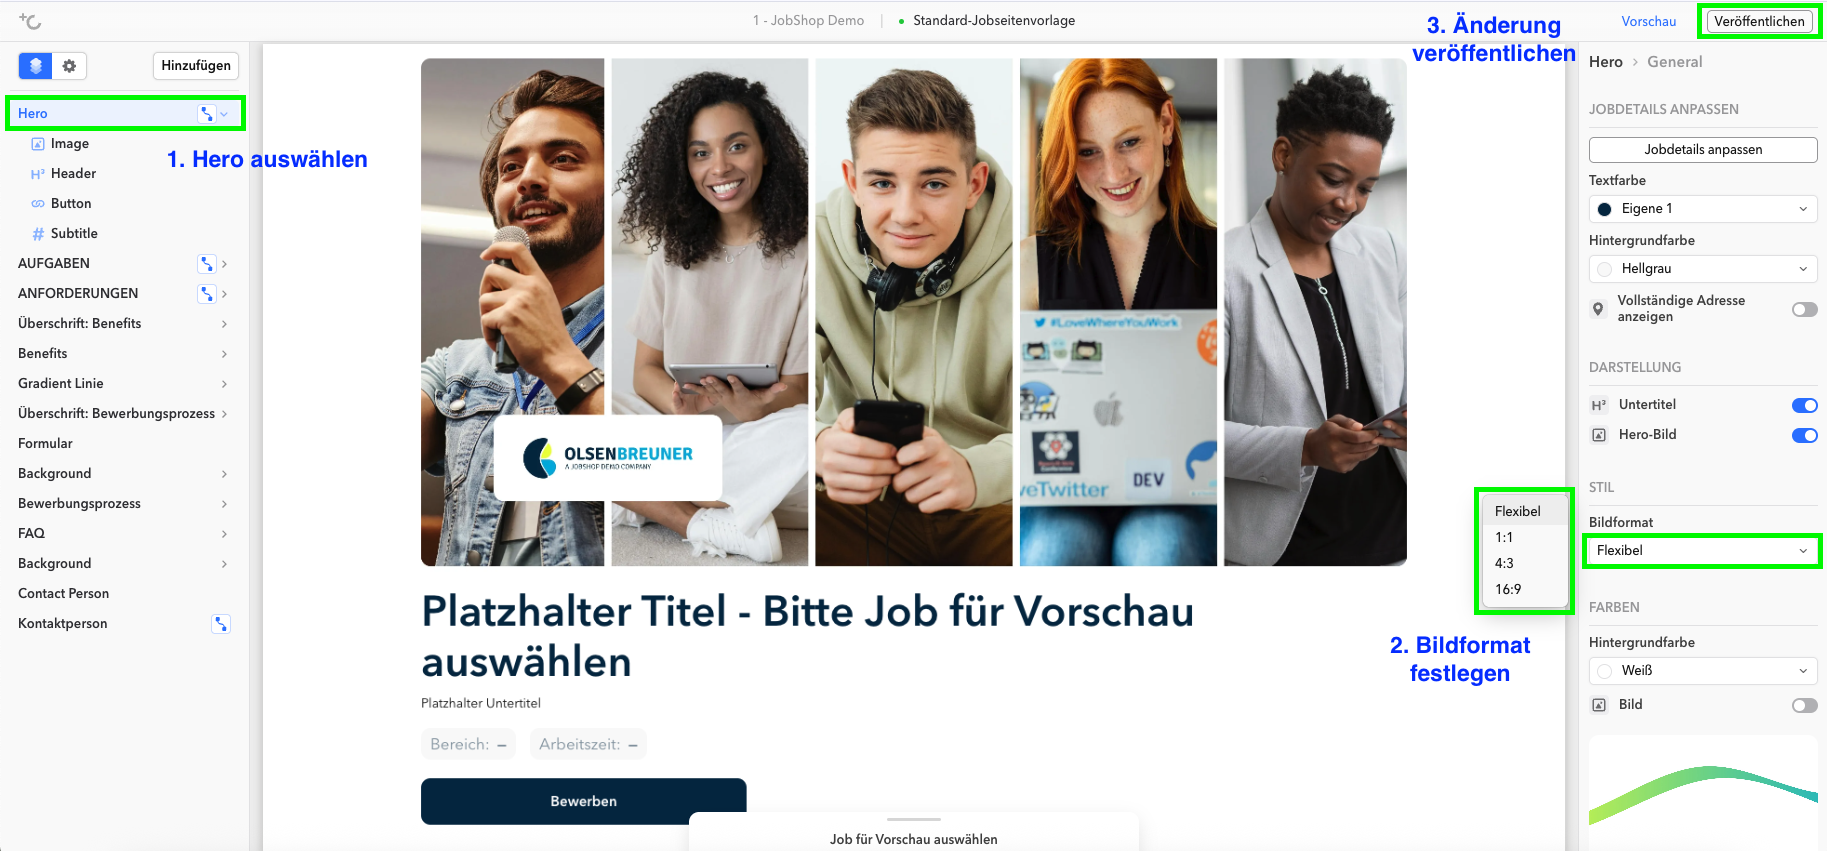
The display of the hero image can also be customized. You can choose between two display modes:
- Flexible (recommended): The image automatically adapts to screen size and device. This ensures that the apply button always remains visible in the first viewport – without applicants having to scroll.
- Fixed aspect ratio (e.g. 4:3 or 16:9): The image is always displayed in the selected ratio. Depending on the device and screen size, the apply button may only become visible after scrolling.
You can find this setting in the job page template editor; as we recommend, "Flexible" is set as the default:
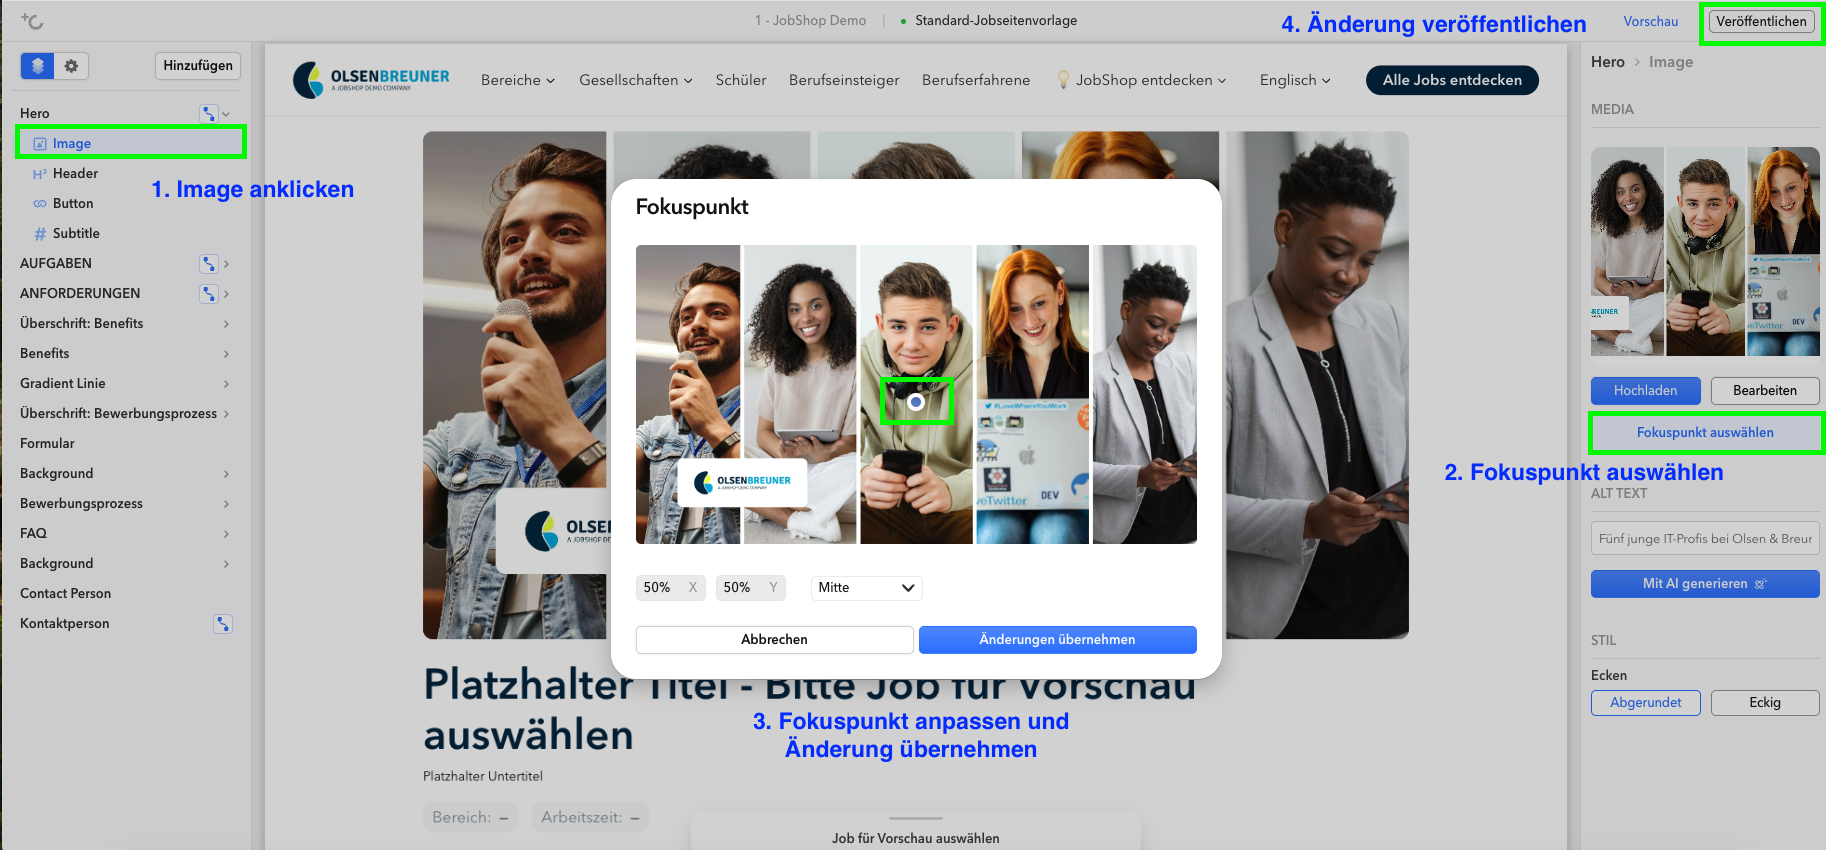
Note on using the "Flexible" setting - Depending on the image you use (e.g. faces of people not centered in the image), it may make sense to adjust the focal point of the image as follows:
In the hero module, you can use "Customize job details" to select which data fields from the ATS are displayed.
If no subtitle is maintained in your system, you can simply hide the subtitle in the hero module.
Notes
- The field names do not always match 1:1 with the labels in the ATS. If you are unsure, simply try out the fields.
- Currently, line breaks in the hero title cannot be edited freely.
Job text field
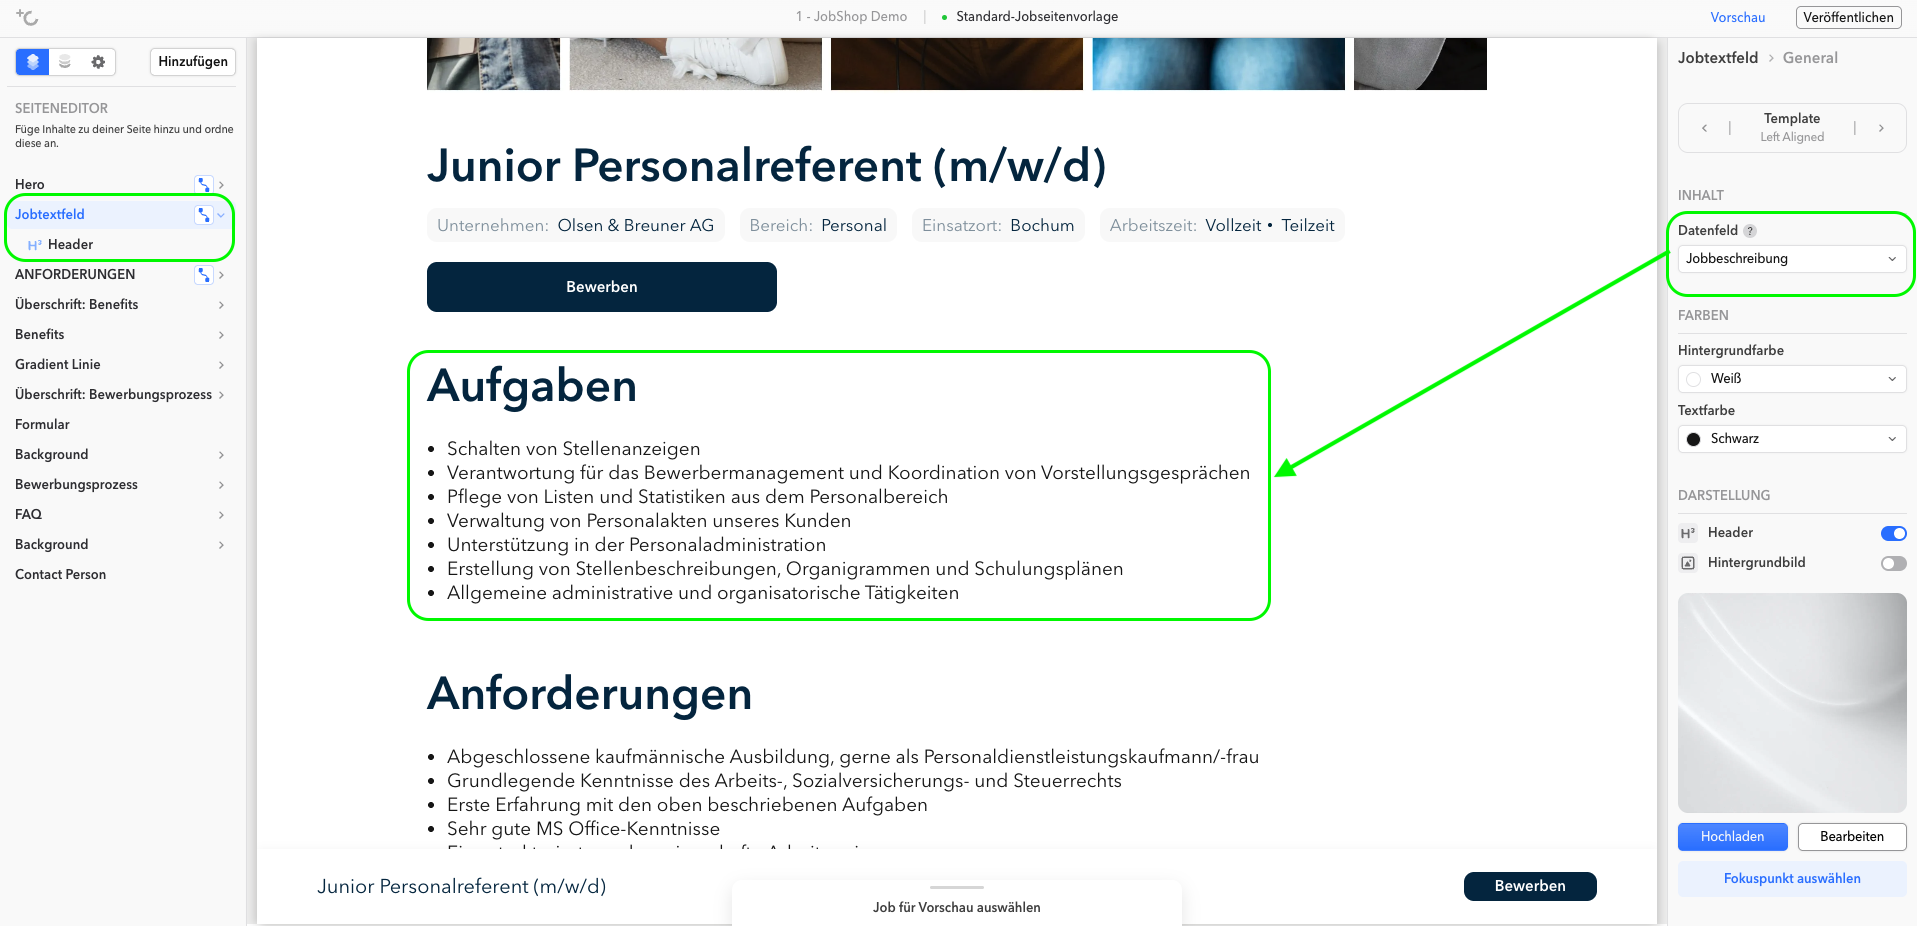
A job text field automatically pulls content from the ATS.
- Note: Wherever content is pulled dynamically from the ATS, you can recognize this by the dynamic icon. Content without this icon is static.
If content is maintained in the ATS, you can include it dynamically via the "Job text field" module. To do this, you need to select the appropriate data field in the module, which accesses the data in the ATS. This depends on how the data fields in the interface are currently configured.
- A job text field may appear empty if no data has been transferred from the ATS for that field or the field has not yet been set up in the mapping.
Notes
- If a heading is already taken from the ATS, you can either adjust the heading stored in the editor in terms of content or remove it entirely and use only the one from the ATS. This can be advantageous when using an XML job feed, for example, as the heading is then transmitted directly and consistently to job portals.
- The formatting of dynamic content cannot be adjusted in the editor. To display the transferred heading in a larger size, for example, you need to change the formatting in the ATS and adjust the font size there.
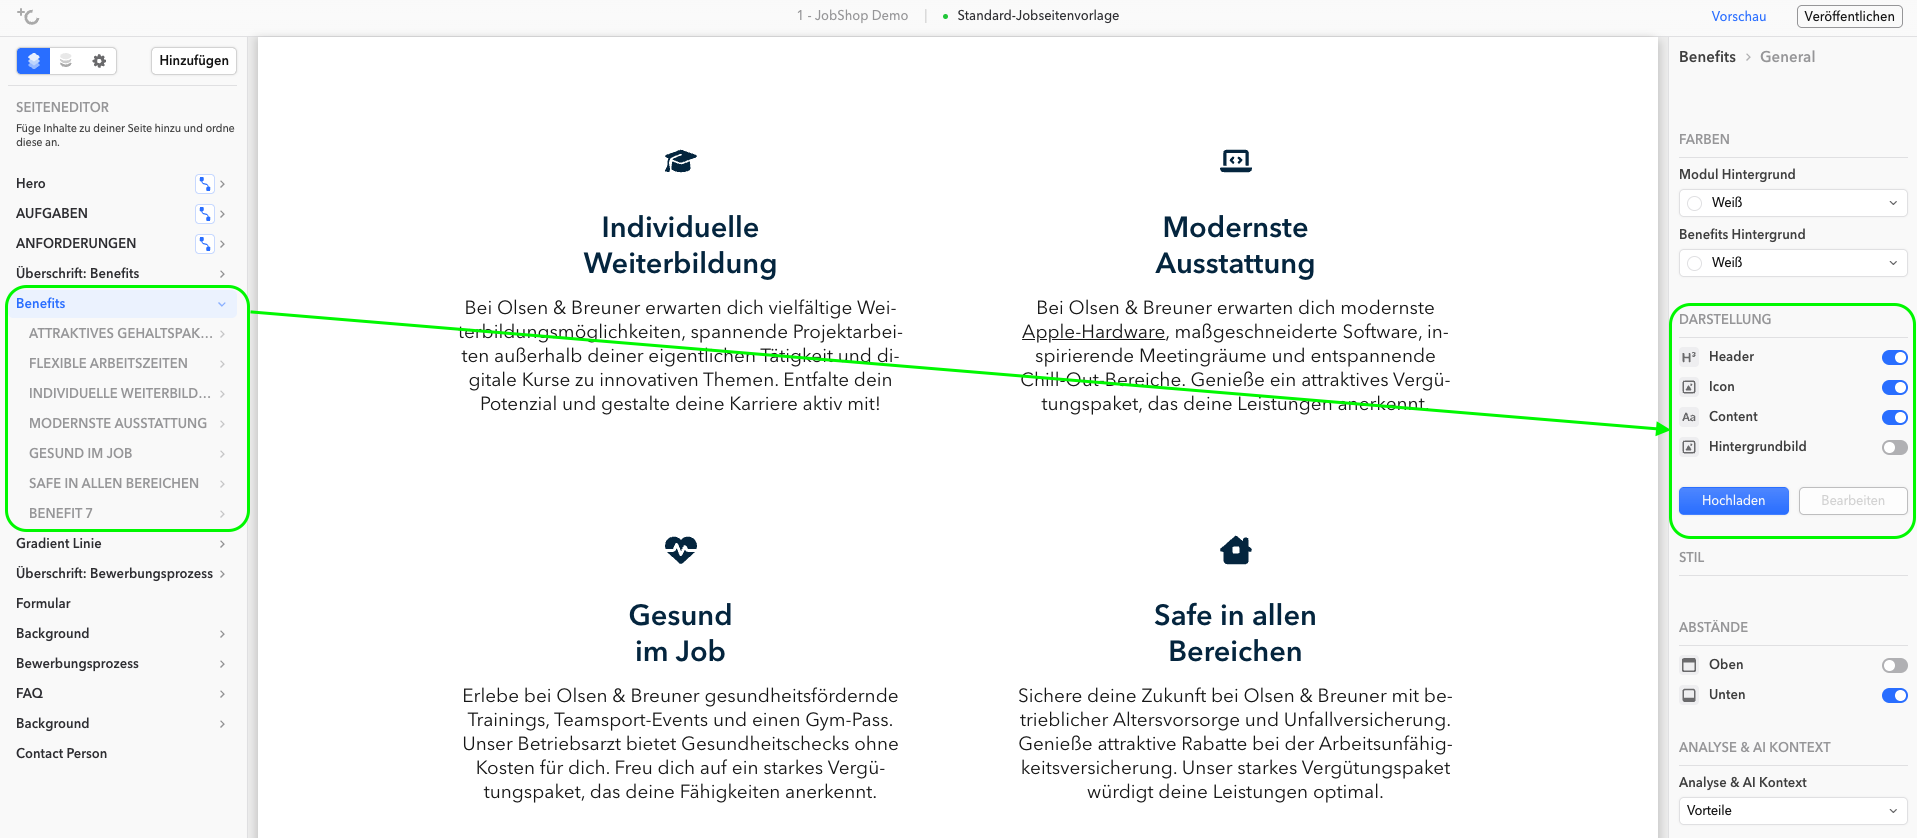
Benefits
No alternative design is currently available for the benefits module. If you would like a different presentation, you can instead use the cards module, the text module, or, for dynamic content, the job text field module to include your benefits.
Fast Application/Form
If you use the Fast Application, the form currently needs to be individually rebuilt by us (talentsconnect) and migrated to the new technology. It will be taken over 1:1 from the existing pages.
Due to the technical complexity caused by the close integration with the fields from the ATS, it is not possible to edit the application form in self-service – this task is handled by your technical contact at talentsconnect.
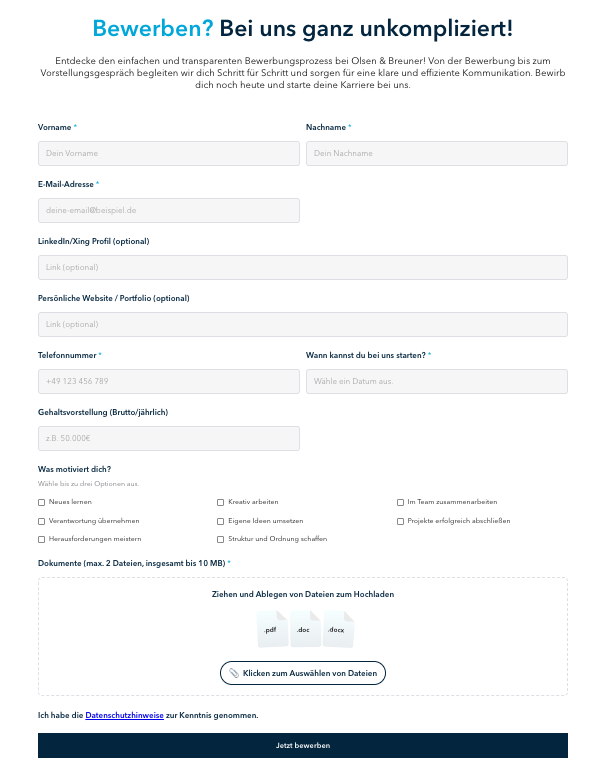
The following design options are available for the form:
Colors
- Label color, description color, placeholder color
- Form background, field background, field text color
- Field border color
- Asterisk color (required field indicator)
- Error color
Apply button
- Button text (freely selectable, e.g. "Apply now")
- Background color, text color
- Fill style (e.g. "Filled")
- Corner radius ("Round" / "Square")
Layout
- Width: Full / Half
- Required field
Text settings
- Input type (dropdown, e.g. "Plain text")
- Maximum length (number field, e.g. 100 characters)
You can already add the form module to the template and determine its placement, but it will only be fully visible once it has been set up by TC.
Jobs (search and filter)
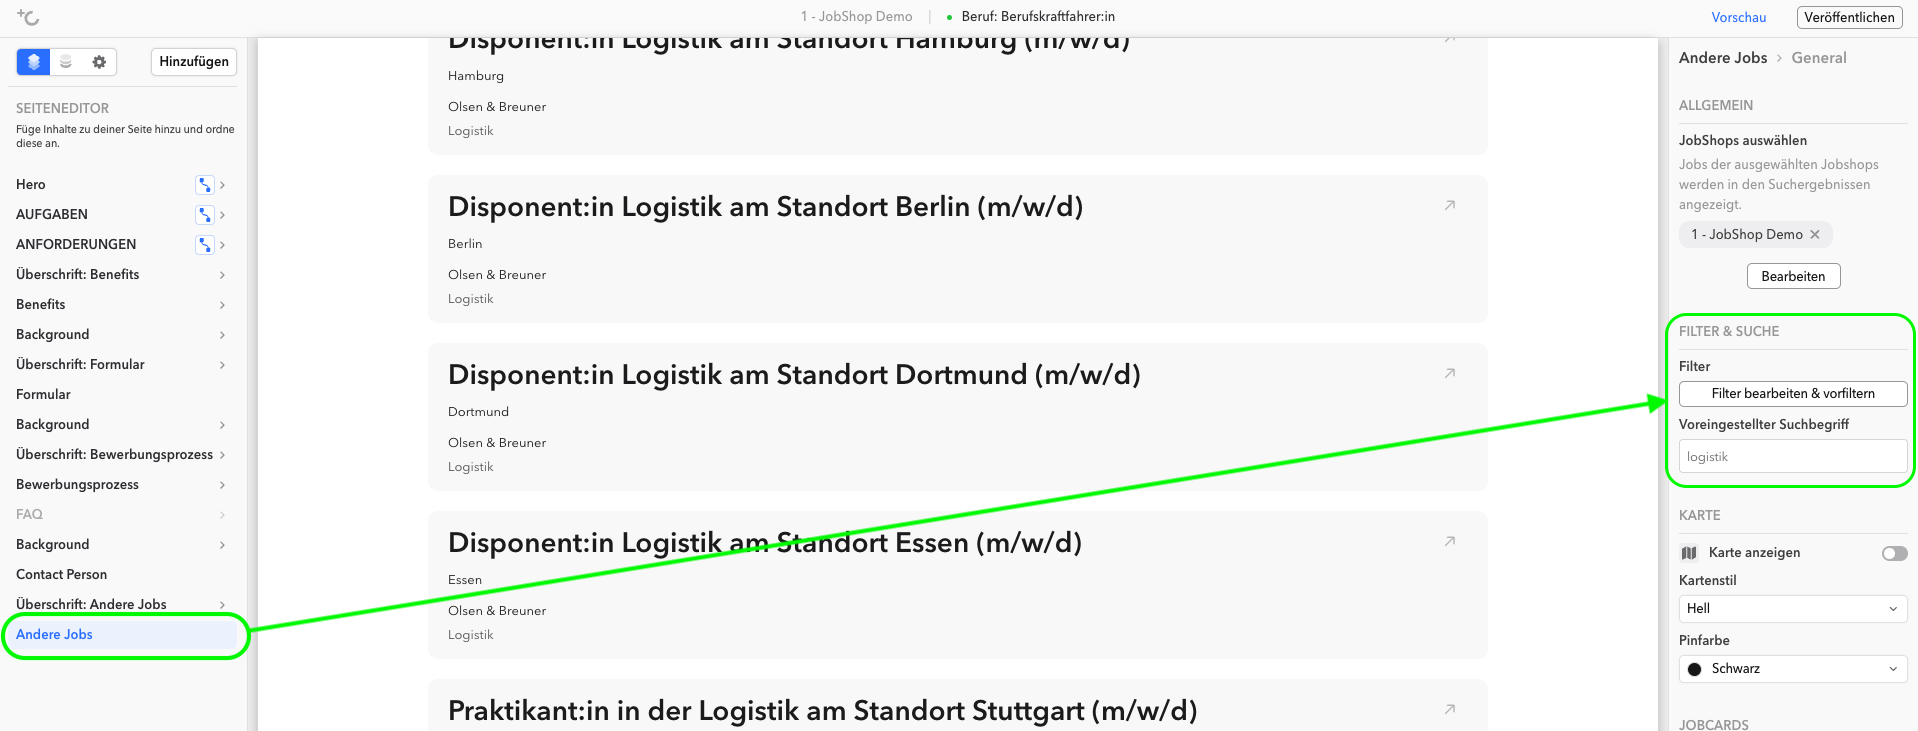
This module can display a selection of related jobs. You can pre-filter which types of jobs candidates should be shown there.
Dynamic contact module
In the dynamic contact module, the contact details of your contact person are pulled from the ATS.
If your ATS has the ability to transmit images via image URL in the job feed, these will also be displayed dynamically.
Note: Unfortunately, not every applicant tracking system meets this technical requirement – so please discuss this with your talentsconnect contact. We are simultaneously working on a further technical solution to enable the dynamic display of contact person photos for all our customers.
Important: If no contact person data is transmitted via the ATS, the entire module will NOT be displayed on the job detail page for applicants.
Static contact module
In the static contact module, you maintain all contact details of the contact person manually directly in the template.
How do I assign jobs to templates?
You have two options for assigning jobs to job page templates:
- Manually via the jobs – if you create and manage jobs manually in talentsconnect Home
- Self-service rule system – if you import your jobs from an ATS / applicant tracking system
Manually via the jobs
You can manually assign jobs to a template. Bulk editing is possible here via filter and/or sorting.
- Important: The template must be published before you can assign jobs to it.
- Tip: A clear naming of templates will help you enormously with assignment later on.
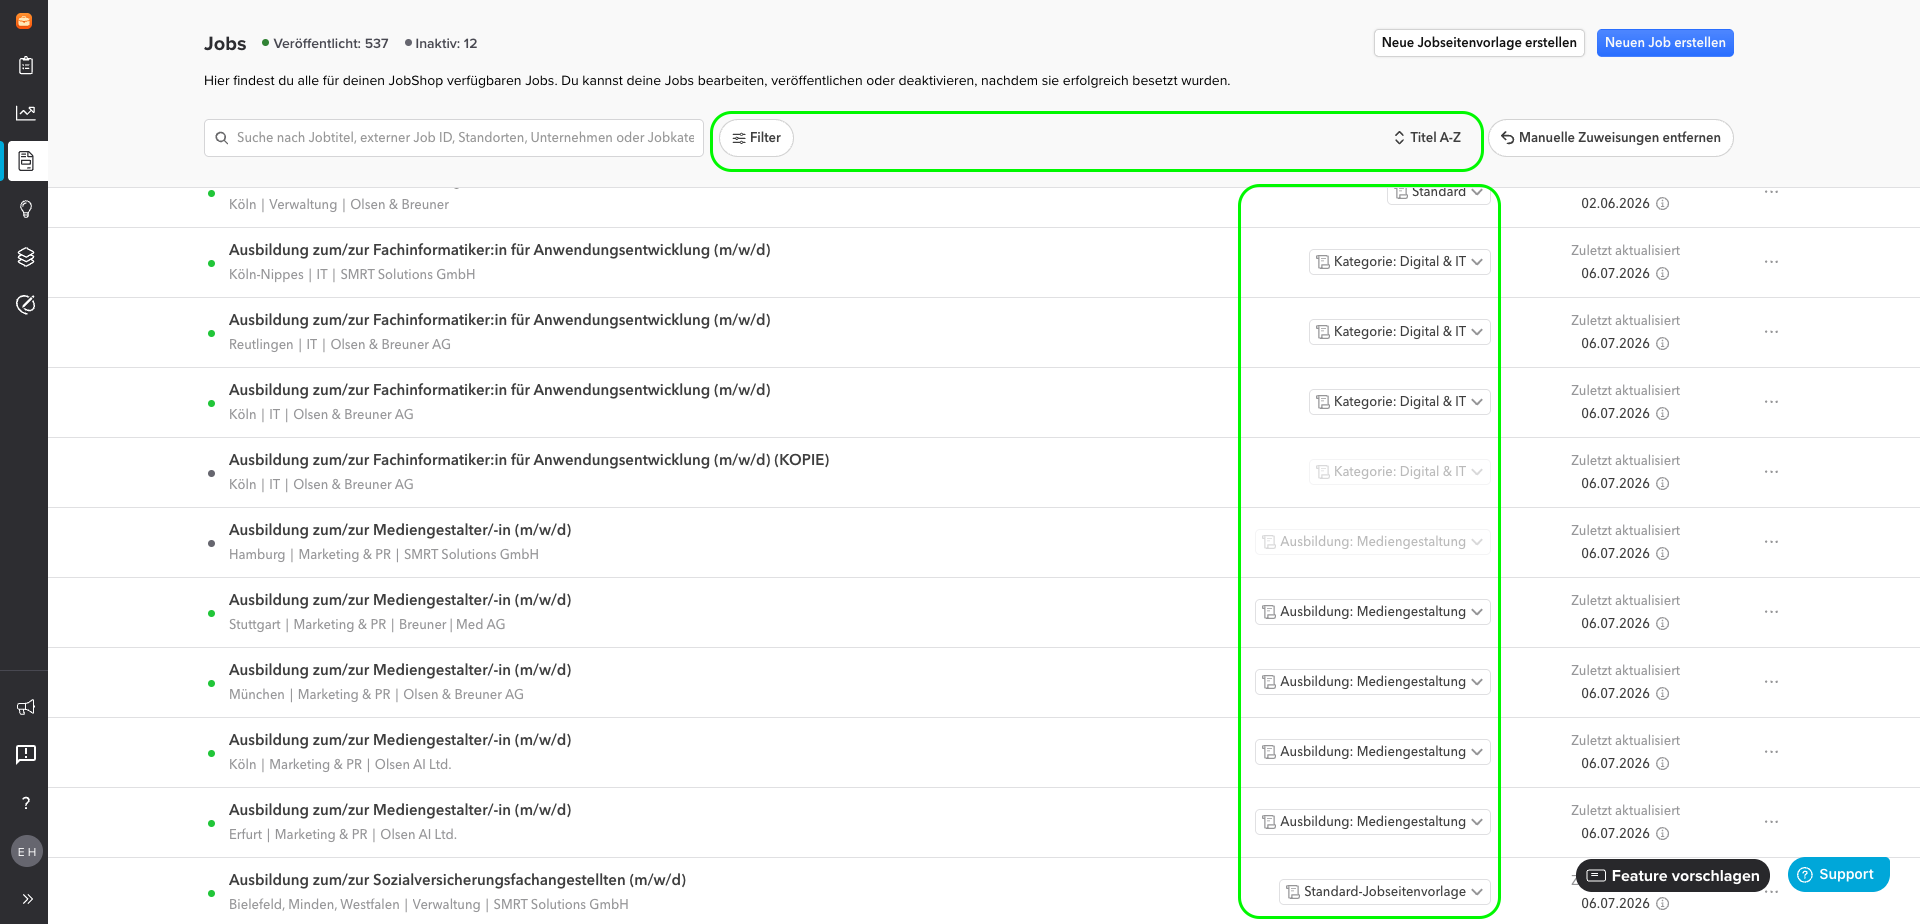
If you create jobs directly in talentsconnect Home, you can select the desired template during creation.
Button "Remove manual assignment"
- This button removes the manual assignments made in TC Home. This is only necessary if you have set up an interface configuration and want to switch the assignment from manual to automatic – your Customer Support contact will be happy to help. As a rule, you do not need to use this button.
- For the initial creation of templates, this is usually not relevant.
A detailed description of the assignment process can be found in the following article: (Optional) Manually link job page template with jobs
OR: Self-service rule system
Important: This functionality is only relevant for you if you import your jobs from an ATS / applicant tracking system. If you create and manage jobs manually in talentsconnect Home, you do NOT need the rule-based assignment and the manual template assignment functions are sufficient for you.
The rule system automatically assigns jobs to the appropriate job page templates based on defined criteria. You can create and customize these rules yourself. You can find out how to create and adjust your own rules in the following article: Rule-based template assignment for job detail pages
Assignment via the ATS (for existing configuration)
Optionally, a custom field (dropdown) can be created in the ATS, through which you select the appropriate template and jobs are thereby assigned to templates. However, this only makes sense once your templates are fully created and clearly named.
Here's how it works:
- Each job page template receives a unique name in talentsconnect Home.
- When publishing a job, your ATS sends exactly this name along with it,
- The JobShop recognizes the name and automatically assigns the correct template.
- If no template name is transmitted, the default template is used.
Was this article helpful?
That’s Great!
Thank you for your feedback
Sorry! We couldn't be helpful
Thank you for your feedback
Feedback sent
We appreciate your effort and will try to fix the article